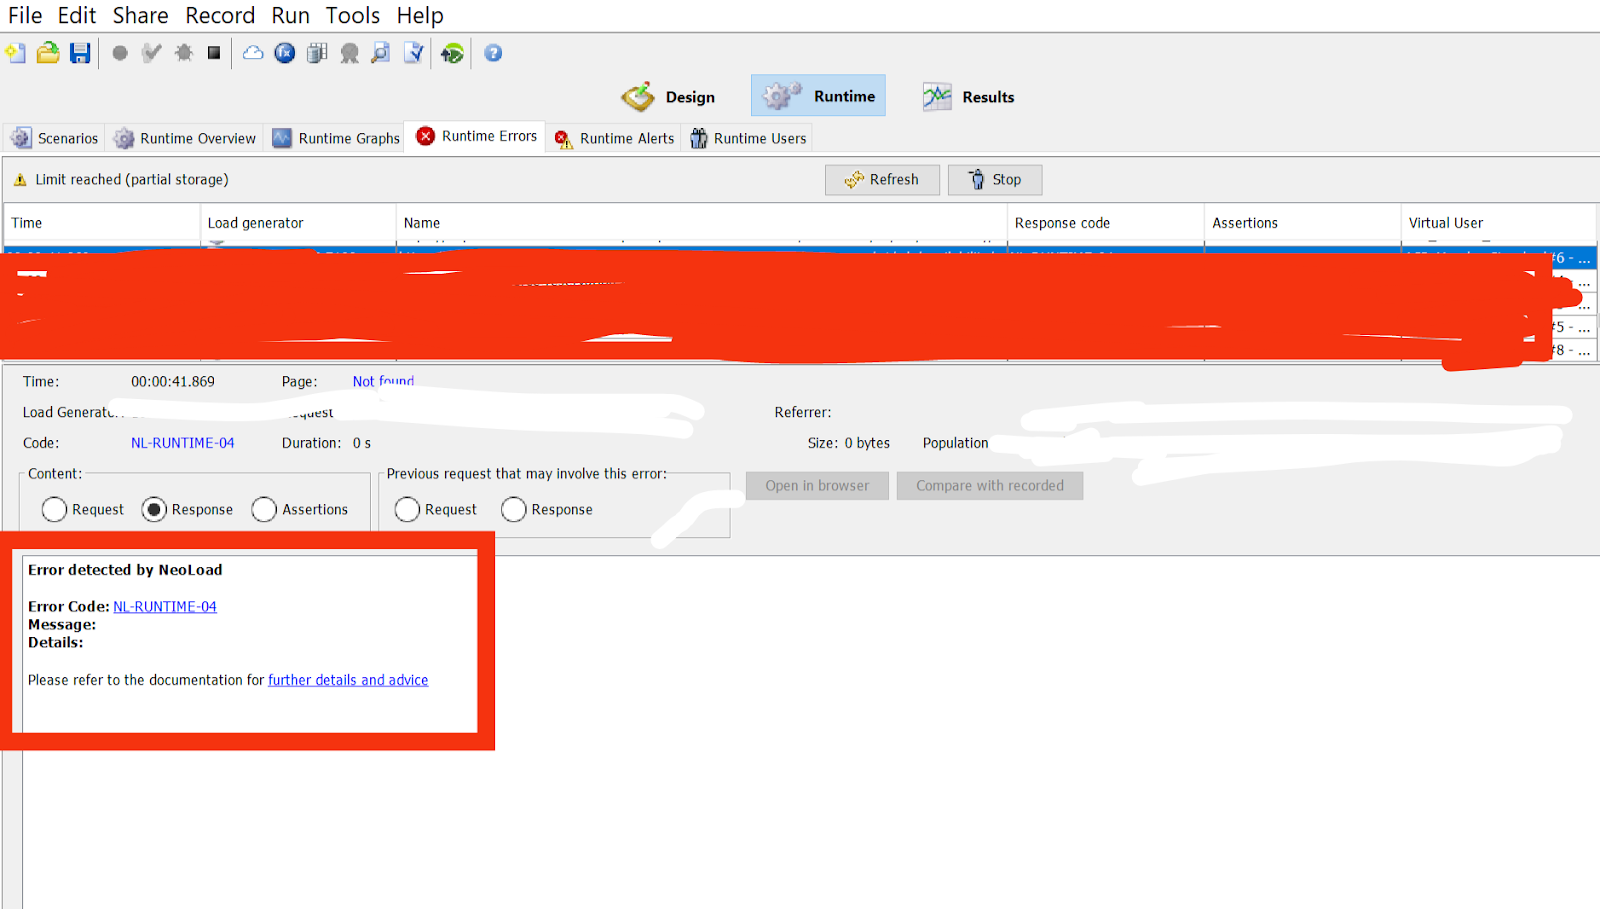
Saturday 27 April 2024

How to Save the downloaded file to local system in load runner

In certain scenarios, downloading files becomes a requirement. Instead of needing to store the files on your local machine for later verification, you may want to measure the transaction time of the download process. To do this, you can capture data from the server response and save it to a file using standard file operations. Just be sure you know the type of file you will be downloading.

Here's an example of downloading a `.pdf` file and saving it to your local system:


// Declare variables
int filePointer;
long fileSize;

// Create a file for writing
filePointer = fopen("c://test_file.pdf", "wb");

// Start a transaction to measure download time
lr_start_transaction("file_download");

// Increase the parameter size to accommodate the data
web_set_max_html_param_len("100000");

// Use web_reg_save_param with the appropriate boundaries to capture server response data for the download
web_reg_save_param("FILEDATA", "LB=", "RB=", "Search=Body", LAST);

// HTTP request to download the .pdf file
web_url("http://serverURL:port/app/resource/getme.pdf");

// Retrieve the download size
fileSize = web_get_int_property(HTTP_INFO_DOWNLOAD_SIZE);

// Write the captured data to an output file
fwrite(lr_eval_string("{FILEDATA}"), fileSize, 1, filePointer);

// End the transaction
lr_end_transaction("file_download", LR_AUTO);

// Close the file
fclose(filePointer);

This code snippet demonstrates how to use file operations and LoadRunner functions to download a PDF file from a server, capture the download data, save it to a local file, and measure the transaction time. By following this process, you can efficiently analyze the download performance without needing to store the downloaded files on your machine for later verification.

Python Script for Dynamically Generating LoadRunner Transaction Names | Automate Transaction Names in LoadRunner

In performance testing and monitoring, it's crucial to understand how different parts of your application are performing under various conditions. Monitoring transactions around key sections of code, such as API calls and critical functions, helps identify performance bottlenecks and areas for optimization. LoadRunner provides powerful tools for performance testing, including functions like `lr_start_transaction` and `lr_end_transaction` that enable you to measure the execution time of specific code blocks. However, adding these functions manually can be a time-consuming and error-prone process. To streamline this task, I've developed a script that automatically inserts transaction monitoring statements around key function calls in a C file. This script simplifies the process and helps you achieve more efficient and consistent performance testing results. Let's explore how this script works.

import re

# Open the data file
with open('C:\\Users\\easyloadrunner\\Downloads\\FeatureChange-V1\\Action.c', 'r') as file:
    data = file.read()

# Split the data into lines
lines = data.split('\n')

# Initialize a variable to store the captured value
captured_value = ""

# Open the output file
with open('C:\\Users\\easyloadrunner\\Downloads\\FeatureChange-V1\\ModifiedAction.C', 'w') as output_file:
    # Loop through each line
    for line in lines:
        # Check if the line contains "web_custom_request "
        if "web_custom_request(" in line:
            # Use regular expression to capture the dynamic value
            captured_value = re.search(r'web_custom_request\("(.+?)"', line).group(1)
            # Add the captured value to the start of the transaction
            new_line = 'lr_start_transaction("' + captured_value + '");\n' + line
        elif "LAST);" in line:
            # Add the end of the transaction
            new_line = line + '\n' + 'lr_end_transaction("' + captured_value + '", LR_AUTO);'
        else:
            new_line = line
        # Write the modified line to the output file
        output_file.write(new_line + '\n')

BatchJob Performance Testing | Batch Job Performance Testing with JMeter

Batch job performance testing involves evaluating the efficiency, scalability, and reliability of batch processes. Start by setting clear goals and objectives for the testing, such as response times and throughput rates. Identify key batch jobs for testing based on business impact and usage patterns. Design test scenarios reflecting normal, peak, and edge cases, and prepare test data sets that resemble production data.

Automate test execution using tools like Apache JMeter and configure the tests to run batch jobs using appropriate samplers. Monitor key performance metrics such as response times, CPU and memory usage, and disk I/O. Conduct load and stress tests to evaluate performance under various conditions, identifying bottlenecks and areas for improvement.

Analyze test results, optimize batch jobs as needed, and re-test to verify improvements. Document findings and recommendations for stakeholders, and incorporate regular performance testing as part of continuous improvement to maintain efficient batch job performance.Batch jobs are automated tasks that run without direct user involvement. They are vital in many sectors for operations such as data backup, processing, report creation, system upkeep, file management, automated testing, database administration, financial transactions, job scheduling, and data archiving.

Types of Batch Jobs:

1. Data Backup and Recovery Jobs: These tasks involve regularly backing up crucial data and databases to ensure data safety and restore points in case of data loss. For instance, a job might back up a company's customer data every night.

2. Data Processing and ETL Jobs: These jobs are used for data extraction, transformation, and loading tasks in data warehousing scenarios. For example, a job may extract data from various sources, transform it to a standard format, and load it into a data warehouse.

3. Report Generation Jobs: These generate complex reports during off-peak hours to minimize impact on system performance. For instance, a job might generate monthly sales reports for management overnight.

4. System Maintenance Jobs: These handle routine maintenance tasks like clearing temporary files and rotating log files. For example, a job might clean up old log files and free up disk space weekly.

5. File Processing Jobs: These tasks manage large file volumes, such as converting file formats and validating data. For instance, a job might convert image files from one format to another and validate data consistency.

6. Automated Testing Jobs: These run tests on applications automatically, ensuring they work as expected without constant user input. For example, a job might perform end-to-end tests on a web application every night.

7. Database Maintenance Jobs: These perform tasks like reindexing databases and checking data integrity. For instance, a job might run a routine maintenance check on a database to ensure optimal performance.

8. Batch Processing in Financial Systems: These jobs handle financial tasks such as payroll processing or generating financial reports. For example, a job might process employee payroll data and generate paychecks every two weeks.

9. Job Scheduling and Automation: These automate various tasks at specific times or intervals. For example, a job might automatically generate backups every evening at 11 p.m.

10. Data Archiving Jobs: These handle archiving old data to maintain optimal database performance and storage usage. For instance, a job might archive data older than five years to a secondary storage location.

Creating a Basic Batch Job using JMeter:

Example: An example of a simple batch job is copying files from one folder to another written in python script. This operation might be scheduled to run every day at midnight, ensuring data consistency and security.

Testing the Batch Job with JMeter:
JMeter can be used to simulate and test the performance of batch jobs. By creating a thread group and adding an OS processor sampler, you can run the batch job command within JMeter. Adding listeners like Aggregate Graph and Summary Report allows you to evaluate performance metrics such as average response time and percentiles.


Metrics for Batch Processing Performance:
  •  Throughput: Number of tasks or commands completed in a specified time period.
  •  Latency: Time taken for a task or command to be submitted and completed.
  •  Utilization: Percentage of available resources (e.g. CPU, memory, disk, network) used during the batch process.
  •  Error Rate: Percentage of tasks or commands that fail or produce incorrect results.
  •  Additional Metrics: May include cost, reliability, scalability, or security, depending on your objectives.
 Data Collection and Analysis:

  • Logging: Record events and messages generated by the batch process in a file or database.
  • Monitoring: Observe and measure performance and status of the batch process and resources used in real time or periodically.
  • Profiling: Identify and measure time and resources consumed by each part or function of the batch process.
  • Auditing: Verify and validate output and results of the batch process against expected standards and criteria.
Use collected data to identify bottlenecks, errors, inefficiencies, or anomalies affecting performance and find root causes and solutions.

Optimizing and Improving Batch Processing Performance:
  • Parallelization: Divide the batch process into smaller, independent tasks or commands to run simultaneously on multiple processors or machines.
  • Scheduling: Determine optimal time and frequency to run the batch process based on demand, availability, priority, or dependency of tasks or commands.
  • Tuning: Adjust parameters, settings, or options of the batch process, resources, or environment to enhance performance and quality.
  •  Testing: Evaluate and compare performance and results before and after applying optimization techniques to ensure they meet expectations and requirements.
   Happy Testing!

Thursday 25 April 2024

How to execute python script in JMeter? | Python script with Apache JMeter

 You can execute Python scripts in JMeter by using the JSR223 Sampler, which supports scripting languages such as Groovy, JavaScript, and Python. The JSR223 Sampler is part of JMeter's core functionality and can be used to execute scripts within your JMeter test plan. Here's how you can execute a Python script in JMeter using the JSR223 Sampler:

1. Add a Thread Group: First, add a Thread Group to your test plan by right-clicking on the test plan and selecting *Add > Threads (Users) > Thread Group*. Configure the Thread Group settings as per your requirements.

2. Add a JSR223 Sampler: Within the Thread Group, add a JSR223 Sampler by right-clicking on the Thread Group and selecting *Add > Sampler > JSR223 Sampler*.

3. Configure the JSR223 Sampler:

    - Name: Give the sampler a descriptive name.

    - Language: Select "python" from the language dropdown.

    - Script: In the script box, enter the Python code you want to execute. You can either write your script directly in the script box or reference an external Python file.

4. Use External Python Files (Optional):

    - If you want to use an external Python file, you can import the file in the script box using the `import` statement.

    - Ensure the Python file is accessible from the JMeter script. You may need to adjust your classpath to include the directory where the file is located.

5. Add Listeners (Optional): You can add listeners like View Results Tree or Summary Report to view the output of the sampler.

6. Run the Test Plan: Execute the test plan by clicking on the green play button at the top of the JMeter interface. The Python script will be executed as part of the test plan.

Here is an example of how you might use the JSR223 Sampler to execute a Python script:


This script prints a message and performs a simple calculation. You can expand on this script to include more complex operations or integrate it with other parts of your JMeter test plan.

Method 2:

In JMeter, the OS Process Sampler is used to execute operating system commands, including scripts like Python scripts. You can use the OS Process Sampler to execute a Python script as part of your JMeter test plan. 

Here's how you can execute a Python script using the OS Process Sampler:
  • Add a Thread Group: First, add a Thread Group to your test plan by right-clicking on the test plan and selecting Add > Threads (Users) > Thread Group. Configure the Thread Group settings according to your needs.
  • Add an OS Process Sampler: Within the Thread Group, add an OS Process Sampler by right-clicking on the Thread Group and selecting Add > Sampler > OS Process Sampler.
  • Configure the OS Process Sampler:
    • Name: Give the sampler a descriptive name.
    • Command: Specify the command to execute the Python script. You will need to provide the path to the Python executable followed by the path to your Python script.
    • Arguments: If your Python script requires any command-line arguments, provide them here.
    • Working Directory: Set the working directory (optional), which is the directory where the script will execute.
  • For example, if you want to run a Python script called my_script.py located at /path/to/script/ using the Python interpreter located at /usr/bin/python3, your configuration would look like this:
    • Command: /usr/bin/python3
    • Arguments: /path/to/script/my_script.py
    • Working Directory: /path/to/script/ (optional)
  • Add Listeners (Optional): You can add listeners such as View Results Tree or Summary Report to view the output of the OS Process Sampler.
  • Run the Test Plan: Execute the test plan by clicking on the green play button at the top of the JMeter interface. The Python script will be executed as part of the test plan.

Happy Testing !!

Token Management in JMeter for Repeated Requests

Apache JMeter is a powerful Java application used for testing the performance and functional behavior of various applications and protocols. One common scenario in testing is the need to generate a token once and then reuse it for multiple requests. Here’s how you can efficiently manage tokens in JMeter:

Step 1: Generate and Extract Token
First, generate the token in one Thread Group and store it using a Json Extractor. Ensure to configure the request with necessary parameters such as host, path, grant-type, client-id, and client-secret. Then, define the JSON Path expressions to extract the token and store it in a variable, such as `access_token`.

Step 2: Store Token
Using a BeanShell Assertion, store the token using the `setProperty()` function. This function facilitates interThreadCommunication, ensuring the token is accessible across different threads. The syntax would be: `${__setProperty(access_token_new, ${access_token})}`.

Step 3: Reuse Token
In subsequent threads, configure requests to utilize the token. This is achieved by using the `property()` function: `${__property(access_token_new)}`.

Important Note:
- Ensure that the number of users/threads for token generation is set to 1, while for other requests, it can be 1 or more.
- Running the test plan will generate the token once, which can then be reused multiple times for other requests.

Monday 8 April 2024

Export the comments for the transaction controller in JMeter to a CSV file

You can export the comments by following these steps:

1. Add a "Simple Data Writer" listener to your test plan. Right-click on the "Thread Group" or any other element in your test plan, then go to Add -> Listener -> Simple Data Writer.

2. Configure the "Simple Data Writer" listener to save the data in CSV format. In the listener settings, specify the filename with a .csv extension (e.g., comments.csv).

3. In the "Write results to file" section of the "Simple Data Writer" listener, select the checkboxes for the data you want to save. To include comments, make sure to check the box next to "Save comments."

4. Run your test plan. Once the test execution is complete, the comments along with other data will be saved to the specified CSV file.

5. Open the CSV file using a text editor or spreadsheet application to view the comments.

This method allows you to export comments along with other data captured during the test execution.

Method 2:

If you don't find the "Save comments" option is in the "Simple Data Writer" listener directly. Instead, you can achieve this by adding a Beanshell PostProcessor to the Transaction Controller.

Here's how you can do it:

1. Add a "Transaction Controller" to your test plan.

2. Inside the Transaction Controller, add the elements you want to measure.

3. Add a "Beanshell PostProcessor" as a child of the Transaction Controller.

4. In the Beanshell PostProcessor, you can use the following script to save the comments to a CSV file:

```java
import java.io.FileWriter;
import java.io.PrintWriter;

String comment = prev.getSampleLabel();

try {
    FileWriter fileWriter = new FileWriter("comments.csv", true);
    PrintWriter printWriter = new PrintWriter(fileWriter);
    printWriter.println(comment);
    printWriter.close();
} catch (Exception e) {
    log.error("Error while writing to file: " + e.toString());
}
```

Replace "comments.csv" with the desired filename for your CSV file.

5. Run your test plan. After execution, the comments will be saved to the specified CSV file.

This script extracts the sample label (comment) of the transaction and appends it to a CSV file.

Wednesday 27 March 2024

Integrating Tosca with Neoload - Step-by-Step Guide

1. Install Tosca and Neoload: Ensure you have both Tosca and Neoload installed on your machine. You can download and install both applications from their respective websites or through your organization's software distribution channels.

2. Configure Tosca:
    - Open Tosca and navigate to `ExecutionLists`. This is where you manage your test execution configurations.
    - Create a new ExecutionList or open an existing one where you want to integrate Neoload.
    - Add the test cases you want to execute with Neoload to this ExecutionList.

3. Install Neoload Integration Pack:
    - Download the Neoload Integration Pack from the Tricentis website. This pack provides the necessary components to integrate Tosca with Neoload.
    - Follow the installation instructions provided with the Integration Pack to install it on your machine.

4. Configure Neoload Integration in Tosca:
    - In Tosca, navigate to `Settings > Options > Execution > Neoload`. This is where you configure the Neoload integration settings.
    - Provide the path to the Neoload executable. This allows Tosca to invoke Neoload during test execution.
    - Configure Neoload settings such as the project name, scenario name, and runtime parameters. These settings determine how Neoload executes the load test.

5. Configure Neoload Integration in Neoload:
    - Open Neoload and navigate to `Preferences > Projects`. This is where you configure Neoload's integration settings with external tools like Tosca.
    - Enable the Tosca integration and provide the path to the Tosca executable. This allows Neoload to communicate with Tosca during test execution.

6. Define Neoload Integration in Tosca ExecutionList:
    - In your Tosca ExecutionList, select the Neoload integration as the execution type. This tells Tosca to use Neoload for load testing.
    - Configure Neoload-specific settings such as the test duration, load policy, and other parameters relevant to your performance testing requirements.

7. Run the Tosca ExecutionList with Neoload Integration:
    - Execute the Tosca ExecutionList as you normally would. Tosca will now trigger Neoload to execute the load test based on the defined settings.
    - During execution, Tosca will communicate with Neoload to start and monitor the load test.

8. Analyze Results:
    - Once the load test execution is complete, analyze the results in both Tosca and Neoload.
    - Use Tosca to review functional test results and Neoload to analyze performance metrics such as response times, throughput, and server resource utilization.
    - Identify any performance issues or bottlenecks and take appropriate actions to address them.

By following these steps, you can effectively integrate Tosca with Neoload to perform combined functional and performance testing.

Wednesday 20 March 2024

JMeter Integration with Jenkins - CICD | Jmeter Continuous Integration With Jenkins

Overview:

This article provides a comprehensive overview of the seamless integration between Apache JMeter, a popular performance testing tool, and Jenkins, a widely-used automation server for continuous integration and continuous delivery (CI/CD) pipelines. The article elucidates the step-by-step process of configuring Jenkins to execute JMeter tests as part of the CI/CD pipeline, enabling automated performance testing throughout the software development lifecycle. By detailing the setup of Jenkins, installation of necessary plugins, and execution of JMeter tests within Jenkins jobs, the article equips readers with the knowledge to effortlessly incorporate performance testing into their CI/CD workflows. Moreover, it emphasizes the significance of monitoring performance metrics and interpreting test results, thereby empowering teams to ensure the scalability and reliability of their applications in production environments.

Jenkins Setup:

To begin, download the latest stable version of Jenkins from the official website. Once downloaded, navigate to the folder where the Jenkins file is located and execute it using the command `java -jar jenkins.war`.

Please note that Jenkins requires an initial user setup before use. Download the latest Jenkins release from the site (note: the .war file should be quite enough).


Performance Plugin - Installation:

To enable JMeter support on Jenkins, you'll need to install the Performance Plugin. 

1. Download the latest version of the plugin from the Performance Plugin page.
2. Copy the performance.hpi file to the plugins folder of your Jenkins installation. If you're running Jenkins from the .war file, place the plugin in the .jenkins/plugins path under your user home folder.
3. Restart Jenkins to activate the plugin.
4. If the installation was successful, you should now see the “Publish Performance Test Result Report” option under Jenkins -> Your Project -> Configure -> “Add post-build action” dropdown.

or

1. Navigate to your Jenkins dashboard page and click on "Manage Jenkins."
2. From the menu options, select "Plugins."
3. In the Plugins page, switch to the "Available" tab.
4. Enter 'performance' in the search field to find the Performance Plugin.
5. Check the installation checkbox next to the Performance Plugin.
6. Select "Install without restart" to install the plugin without needing to restart Jenkins.

JMeter Installation:

To install JMeter, adhere to these instructions:

1. Visit the Apache JMeter downloadspage.
2. Choose the appropriate download option for your system: .zip for Windows or .tgz for Linux. Since this tutorial is for Linux, the .tgz option is demonstrated.
3. Extract the downloaded file to your desired location, such as /usr/jmeter.
4. Edit the file located at <YOUR-JMETER-PATH>>/bin/user.properties. For instance, usr/jmeter/bin is used in this example.
5. Add the following command to the last line of the file: jmeter.save.saveservice.output_format=xml. Save and close the file to apply the changes.

Create your JMeter script using a GUI:

Here are the steps to create JMeter script:

1. Run the file: `<YOUR-JMETER-PATH>>/bin/jmeter.sh` to open the JMeter GUI. For instance, `/usr/jmeter/bin/jmeter.sh` is used in this example. In a definitive installation, you can set these commands to your path system or system variables. For Windows users, the file will be `jmeter.bat`.
2. From the JMeter GUI, navigate to File, and then select New.
3. Enter a name for your test plan.
4. On the left side of the screen, using the right or secondary select with your mouse, select your test plan. Follow this path: Add > Thread(Users) > Thread Group, and select it.
5. In the Thread Group, increase the Number of Threads (users) to five and the Loop Count to two.
6. On the left side of the screen, right or secondary select Thread Group with your mouse, then follow this path: Add > Sampler > HTTP Request, and select the HTTP Request option.
7. In the HTTP Request, enter the Name of your test, the Server Name or IP, and the Path context.
8. Repeat steps six and seven two more times for different contexts/pages. 
9. To add a visual report, right or secondary select your Thread Group, then follow the path: Add > Listener > View results in table. Select the View Results in Table option.
10. Save the test plan by selecting the Save (disk) icon in the upper left side of the screen or go to File > Save, and enter a name for the test plan with a .jmx extension.


To run the test plan using the command line and integrate it with Jenkins, From the terminal, execute the following commands:

set OUT=jmeter.save.saveservice.output_format
set JMX=/usr/jmeter/bin/easyloadrunner.jmx
set JTL=/usr/jmeter/reports/easyloadrunner.report.jtl
/usr/jmeter/bin/jmeter -j %OUT%=xml -n -t %JMX% -l %JTL%

These commands set up the necessary variables and then execute JMeter with the specified parameters to run the test plan. Adjust the paths and filenames as needed to match your setup.

Execute JMeter Tests With Jenkins:

To execute JMeter from Jenkins and integrate the test results, follow these steps:

1. From the Jenkins dashboard, click on "New Item."
2. Enter a name for the item, for example "JmeterTest", select "Freestyle project", and then click "OK."
3. Go to the "Build Environment" tab, click on "Add build step," and select "Execute Windows batch command."
4. Enter the same code used to run JMeter from the command line in the previous section.

set OUT=jmeter.save.saveservice.output_format
set JMX=/usr/jmeter/bin/easyloadrunner.jmx
set JTL=/usr/jmeter/reports/easyloadrunner.report.jtl
/usr/jmeter/bin/jmeter -j %OUT%=xml -n -t %JMX% -l %JTL%


5. Go to the "Post-build Action" tab, click on "Add post-build action," then select "Publish Performance test result report."
6. Fill in the source for these reports.
7. Save the project, and then click on "Build Now" from the "JmeterTest" page.
8. After the job finishes, navigate to the "Console Output" to view the execution details.
9. From the "Console Output" view, you can access the Performance Report and view the JMeter report data.


#JMeter #Jenkins #CI/CD #ContinuousIntegration #PerformanceTesting #LoadTesting #Automation #DevOps #TestAutomation #JenkinsPipeline #PerformanceTestingAutomation #SoftwareTesting #IntegrationTesting #TestExecution #TestAutomationFramework

Monday 11 March 2024

Performance Testing Job description and Performance tester Roles and Responsibilities

 Skills Needed:

  • Performance Testing or Performance Tuning
  • Tools: NeoLoad, JProfiler, JMeter, YourKit, LoadRunner, Load Balancer, Gatling
  • Monitoring Tools: Splunk, Dynatrace, APM
  • Databases: Oracle, SQL
  • Robotics RPA
  • AI/ML
  • Gen AI
  • Programming: Java, C
  • Cloud: AWS, GCP, Azure
  • Wireshark: A popular network protocol analyzer used for capturing and analyzing network traffic in real-time. It helps in diagnosing network issues and understanding communication patterns between systems.
  • Fiddler: An HTTP debugging proxy tool that captures HTTP traffic between a computer and the internet. It allows performance testers to inspect and modify HTTP requests and responses, analyze network traffic, and diagnose performance issues.
  • iperf: A command-line tool used for measuring network bandwidth, throughput, and latency. It can generate TCP and UDP traffic to assess network performance between servers or devices.
  • Netcat (nc): A versatile networking utility that can read and write data across network connections using TCP or UDP protocols. It's commonly used for port scanning, network troubleshooting, and performance testing.
  • Ping and Traceroute: Built-in command-line utilities available in most operating systems for testing network connectivity and diagnosing network-related issues. Ping measures round-trip time and packet loss to a destination host, while Traceroute identifies the path packets take to reach the destination.
  • Nmap: A powerful network scanning tool used for discovering hosts and services on a network, identifying open ports, and detecting potential security vulnerabilities. It's useful for assessing network performance and identifying potential bottlenecks.
  • TCPdump: A command-line packet analyzer that captures and displays TCP/IP packets transmitted or received over a network interface. It's commonly used for troubleshooting network issues and analyzing network traffic patterns during performance testing.
  • Introduction to Performance Testing
  • Understanding Performance/Nonfunctional Requirements
  • Building High-Performing and Resilient Products
  • Designing Workload Models and Performance Scenarios
  • Defining KPIs and SLAs
  • Profiling and Optimization Techniques
  • Influencing Architectural Decisions for Performance
  • Benchmarking and Sizing
  • End-to-End Load Testing and Resiliency Testing
  • Creating and Maintaining Performance Test Scripts
  • Generating Performance Reports and Analytics
  • Mitigating Performance Issues
  • Strategies for In-Sprint Performance Testing
  • Qualifications and Skills Required
  • Additional Responsibilities and Skills
  • Conclusion: Elevating Performance Testing in Your Organisation
  • Familiarity with CI/CD pipelines and integration of performance tests into the development process.
  • Knowledge of microservices architecture and performance testing strategies specific to it.
  • Experience with containerization technologies such as Docker and orchestration tools like Kubernetes for performance testing in containerized environments.
  • Proficiency in scripting languages like Python for automation and customization of performance tests.
  • Understanding of web technologies such as HTML, CSS, JavaScript, and frameworks like React or Angular for frontend performance testing.
  • Experience with backend technologies such as Node.js, .NET, or PHP for backend performance testing.
  • Knowledge of API testing and performance testing of RESTful APIs using tools like Postman or SoapUI.
  • Familiarity with database performance testing tools such as SQL Profiler, MySQL Performance Tuning Advisor, or PostgreSQL EXPLAIN.
  • Experience with visualization tools like Grafana, Kibana, or Tableau for analyzing performance metrics and trends.
  • Understanding of security testing concepts and tools for assessing application security during performance testing.
  • Knowledge of networking fundamentals, protocols (HTTP, TCP/IP), and network performance testing tools like Wireshark or Fiddler.
  • Experience with mobile performance testing tools and platforms for assessing the performance of mobile applications on different devices and networks.
  • Proficiency in version control systems like Git for managing test scripts and configurations.
  • Apache JMeter: While primarily known as a client-side performance testing tool, JMeter can also be used to simulate server-side behavior by creating HTTP requests to backend services and APIs. It's versatile and can handle various server-side protocols like HTTP, HTTPS, SOAP, REST, JDBC, LDAP, JMS, and more.
  • Apache Bench (ab): A command-line tool for benchmarking web servers by generating a high volume of HTTP requests to a target server. It's useful for measuring server performance under load and stress conditions, assessing response times, throughput, and concurrency levels.
  • Siege: Another command-line benchmarking tool similar to Apache Bench, Siege allows testers to stress test web servers and measure their performance under different load scenarios. It supports HTTP and HTTPS protocols and provides detailed performance metrics and reports.
  • wrk: A modern HTTP benchmarking tool designed for measuring web server performance and scalability. It supports multithreading and asynchronous requests, making it efficient for generating high concurrency loads and assessing server performance under heavy traffic.
  • Gatling: While primarily a client-side load testing tool, Gatling can also be used for server-side performance testing by simulating backend services and APIs. It's highly scalable, supports scripting in Scala, and provides detailed performance metrics and real-time reporting.
  • Apache HTTP Server (Apache): An open-source web server widely used for hosting websites and web applications. Performance testers can analyze Apache server logs, monitor server resource usage, and optimize server configuration settings for better performance.
  • NGINX: Another popular open-source web server and reverse proxy server known for its high performance, scalability, and efficiency in handling concurrent connections and serving static and dynamic content. Performance testers can assess NGINX server performance using access logs, monitoring tools, and performance tuning techniques.
  • Tomcat: An open-source Java servlet container used for deploying Java-based web applications. Performance testers can analyze Tomcat server logs, monitor JVM metrics, and optimize server settings to improve application performance and scalability.
  • Node.js: A runtime environment for executing JavaScript code on the server-side, commonly used for building scalable and high-performance web applications. Performance testers can analyze Node.js application logs, monitor event loop performance, and optimize code for better throughput and response times.
  • WebPageTest: A free online tool that performs website performance testing from multiple locations around the world using real browsers (such as Chrome, Firefox, and Internet Explorer). It provides detailed performance metrics, waterfall charts, and filmstrip views to analyze page load times, resource loading behavior, and rendering performance.
  • Google Lighthouse: An open-source tool for auditing and improving the quality and performance of web pages. It provides performance scores based on metrics like First Contentful Paint (FCP), Largest Contentful Paint (LCP), Total Blocking Time (TBT), and Cumulative Layout Shift (CLS). Lighthouse also offers recommendations for optimizing performance, accessibility, SEO, and best practices.
  • GTmetrix: A web-based performance testing tool that analyzes website speed and provides actionable recommendations for optimization. It measures key performance indicators like page load time, total page size, and the number of requests. GTmetrix also offers features for monitoring performance trends over time and comparing performance against competitors.
  • YSlow: A browser extension developed by Yahoo! that analyzes web pages and suggests ways to improve their performance based on Yahoo's performance rules. It provides grades (A to F) for various performance metrics and recommendations for optimizing factors like caching, minification, and image optimization.
  • PageSpeed Insights: A tool by Google that analyzes the performance of web pages on both mobile and desktop devices. It provides performance scores and specific recommendations for improving page speed, such as optimizing images, leveraging browser caching, and minimizing render-blocking resources.
  • Chrome DevTools: A set of web development and debugging tools built into the Google Chrome browser. DevTools includes features like Network panel for monitoring network activity, Performance panel for analyzing page load performance, and Lighthouse integration for auditing web page quality and performance.
  • Selenium WebDriver: A popular automation tool for testing web applications by simulating user interactions in web browsers. Performance testers can use Selenium to automate repetitive tasks, measure page load times, and assess the responsiveness of web pages under different load conditions.
  • Puppeteer: A Node.js library for controlling headless Chrome and Chromium browsers. It allows performance testers to automate browser tasks, capture performance metrics, and generate screenshots or videos of web page interactions. Puppeteer is useful for testing Single Page Applications (SPAs) and performing scripted user journeys.
  • Web Vitals: A set of essential performance metrics introduced by Google to measure and improve the user experience of web pages. Web Vitals include metrics like Largest Contentful Paint (LCP), First Input Delay (FID), and Cumulative Layout Shift (CLS), which focus on loading performance, interactivity, and visual stability.

 Requirements:

  • Handson experience in LoadRunner/Performance Center (PC) is a MUST. Experience with opensource tools like JMeter, Gatling, etc., is a plus.
  • Handson experience with monitoring tools such as Dynatrace, Splunk, AppDynamics, etc.
  • Experience in Performance Bottleneck Analysis, especially using Splunk.
  • Strong experience in creating performance test strategy, design, planning, workload modeling, and eliciting nonfunctional requirements for testing.
  • Handson experience in Cloud technologies like AWS, GCP, and Azure.
  • Proficiency in profiling and performance monitoring.
  • Experience with microservices architecture, Docker, Kubernetes, Jenkins, Jira, and Confluence is a must.
  • Good experience in providing Performance Tuning Recommendations.
  • Handson experience in at least one ObjectOriented Programming Language (Java, Python, C++, etc.) is beneficial.
  • Expertise in Performance Test Management and Estimations.
  • Handson experience in shiftleft Agile testing.
  • Experience in the Airline domain is advantageous.
  • Prior CustomerFacing Experience is required.
  • Experience in Mobile Performance Testing is beneficial.
  • Ability to recommend test methodologies, approaches for testing, and improving application performance.
  • Experience with SQL and application performance tools.
  • Good Communication and interpersonal skills are required.
  • Technical Performance Tester with 5+ years of experience.
  • Excellent written and verbal communication skills.
  • Strong consulting and stakeholder management skills.
  • Expertise in LoadRunner suite (Professional/Cloud/Enterprise) and opensource tools for load testing, performance testing, stress testing.
  • Ability to explain the value and processes of performance testing to projects.
  • Proficiency in providing expert performance testing advice, guidance, and suggestions.
  • Experience in application and database performance tuning/engineering.
  • Knowledge of performance testing with CI/CD.
  • Experience in performance testing with cloud infrastructure.
  • Expert knowledge of various performance testing tools like Neoload, JProfiler, JMeter, YourKit, and Loadrunner.
  • Expertise in Web Browser Profiling and Web Browser Rendering Optimizations.
  • Experience in EndtoEnd Performance Engineering across all tiers.
  • Experience with Backend technologies like Oracle, SQL.
  • Experience analyzing and interpreting large volumes of data using tools like Splunk, APM, Dynatrace.
  • Additional skills: Expertise in benchmark testing, performance analysis, tuning, experience in building 3tier applications using modern technology, troubleshooting, and resolution of performance issues on production.
  • Strong analytical and problemsolving skills, creative thinking.
  • Enthusiasm, influence, and innovation.
  • Ability to lead technical accomplishments and collaborative project team efforts.
  • Customer focus and quality mindset.
  • Ability to work in an agile environment, in crossfunctional teams, delivering useroriented products in a fastpaced environment.
  • Experience conducting performance testing for applications deployed on cloud platforms.
  • Understanding of performance testing strategies specific to microservices architecture.
  • Familiarity with integrating performance testing into CI/CD pipelines for automated and continuous testing.
  • 48 years of experience in performance testing with a focus on LoadRunner.
  • Strong expertise in SNOW (ServiceNow) testing, including ATF (Automated Test Framework).
  • Experience in designing, implementing, and maintaining automated performance tests.
  • Knowledge of CI/CD pipelines and integration of performance tests into the development process.
  • Strong analytical and problemsolving skills.
  • Excellent communication and collaboration skills.
  • Proven ability to work effectively in a team environment.
  • 710 years of experience in automation testing.
  • Passionate about QA and breaking software systems.
  • Good knowledge of Software Testing concepts and methodology.
  • Good Understanding of Web fundamentals (MVC, HTML, JavaScript, CSS, ServerSide Programming, and Database).
  • Good programming skills (Java/Ruby/Python/Node.js/JavaScript).
  • Good knowledge of ObjectOriented Programming concepts and Design Patterns.
  • Handson Knowledge of Test Automation approaches, Frameworks, and Tools.
  • Handson experience in UI, API, Crossbrowser Testing Tools, and Automation.
  • Handson knowledge of Continuous Integration & Continuous Deployment and Continuous integration tools (Jenkins/Travis/Teamcity).
  • Good Analytical and ProblemSolving Skills.
  • Familiarity with other performance testing tools and technologies.
  • Experience in performance testing of cloudbased applications and services.
  • Experience with other monitoring and visualization tools for performance testing.


Roles and Responsibilities:

  • Understand performance/nonfunctional requirements closely with Engineering teams, focusing on application and infrastructure areas.
  • Assist in building highperforming and resilient products by utilizing instrumentation, automation frameworks, and software tools for complex simulations in an agile, fastpaced environment.
  • Design workload models, define performance scenarios and test conditions, and establish KPIs and SLAs for the application under test.
  • Use profiling tools to identify hotspots for resource usage and develop optimizations to enhance performance and scalability.
  • Influence architectural decisions to deliver highperforming software, identify performance bottlenecks, and make optimization recommendations.
  • Take responsibility for benchmarking and sizing, participating in feature and system design throughout the software development lifecycle to ensure high performance.
  • Perform endtoend load testing and resiliency testing.
  • Create and maintain performance test scripts using tools like Neoload, LoadRunner, Jprofiler, JMeter, and others.
  • Generate performance status reports and analytics trends for current releases and production.
  • Partner with key stakeholders to mitigate performance issues and ensure timely delivery of projects.
  • Develop strategies with delivery teams for insprint performance testing and engineering.Lead and execute performance testing initiatives across web, backend, mobile platforms, databases, and ETL processes.
  • Design, develop, execute, and maintain comprehensive performance test scripts using JMeter.
  • Collaborate closely with crossfunctional teams to analyze system requirements and translate them into effective performance test strategies.
  • Conduct load and stress tests to identify and address performance bottlenecks.
  • Analyze performance metrics and collaborate with teams to pinpoint performance issues and areas for improvement.
  • Evaluate application scalability and recommend enhancements.
  • Work closely with development and operations teams to implement performance enhancements.
  • Maintain comprehensive documentation of performance test plans, scripts, results, and recommendations.

 Qualifications:

  •  Bachelor's degree in computer science, engineering, or a related field.
  •  A minimum of 10 years of experience in performance testing and quality assurance.
  •  Strong analytical and problem solving skills.
  •  Excellent communication and collaboration skills.
  •  Proactive and results driven Performance Testing Lead with a strong background in performance testing and a keen interest in the banking domain.
  • Proven expertise in performance testing tools like LoadRunner and JMeter.
  • Proficiency in monitoring tools including App Dynamics, Grafana, and Kibana.
  • Preferably, experience in the banking domain with a strong understanding of its unique performance testing requirements.
  • Hands on experience in microservices and API performance testing.
  • Proficiency in Java scripting (preferred).
  • Strong analytical and problemsolving skills.
  • Excellent communication skills.
  • Detailoriented and organized.
  • 48 years of experience in performance testing and engineering.
  • Expertise in JMeter (primary) and other performance tools like NeoLoad, BlazeMeter, Gatling, LoadRunner, etc.
  • Ability to understand requirement gathering and create performance test strategies and plans.
  • Indepth understanding of web technologies, backend systems, mobile application development, relational databases, and ETL processes.
  • Proficiency in scripting and programming languages relevant to performance testing (e.g., Java, JavaScript, Python, SQL).
  • Proficiency in HTTP/web protocol script development.
  • Experience with E2E page rendering performance testing using performance tools.
  • Ability to write custom requests and codes in JMeter or other performance tools.
  • Knowledge of API and Database Performance testing.
  • Familiarity with capturing performance metrics using Grafana and Dynatrace.
  • Clear understanding of Work Load Modeling.
  • Experience in capturing heap dumps and thread dumps.
  • Knowledge of Performance Baseline and Benchmarking, along with different types of performance testing.
  • Proactive approach towards the job at hand, with the ability to predict future requirements and prepare accordingly.
  • Excellent communication skills in English, both verbal and written.
  • Strong customer relationshipbuilding skills.
  • Detailoriented with strong organizational and time management skills.
  • Proficiency in agile project management and collaboration tools.

Friday 8 March 2024

Running Python Scripts with BigTable Queries in JMeter: A Step-by-Step Guide

Are you looking to integrate Python scripts containing BigTable queries into your JMeter test plan? While JMeter doesn't natively support Python execution, you can achieve this using the JSR223 Sampler along with Jython, a Java implementation of Python. This guide will walk you through the process, from setting up Jython to executing your Python scripts seamlessly within JMeter.

1. Download Jython:
   Start by downloading Jython and adding the Jython standalone JAR file to JMeter's `lib` directory. This step is crucial as Jython will serve as the bridge between JMeter's Groovy scripting language and Python.

2. Configure JSR223 Sampler:
   - Add a JSR223 Sampler to your JMeter test plan.
   - Choose "groovy" as the scripting language for the sampler.
   - Write Groovy code within the sampler to execute your Python script using Jython. This involves importing the necessary Jython modules and then executing your Python code within the Groovy script.

3. Python Script Modifications:
   Adjust your Python script to ensure compatibility with Jython. Some Python libraries may not work seamlessly in Jython, so you may need to make modifications accordingly. Additionally, ensure that your Python script includes proper authentication for accessing BigTable, such as service account credentials.

4. BigTable Authentication:
   Ensure that your Python script includes proper authentication for accessing BigTable. This typically involves using service account credentials or other authentication mechanisms provided by Google Cloud Platform.

Example Groovy Script for JSR223 Sampler:
```groovy
import org.python.util.PythonInterpreter;

PythonInterpreter interpreter = new PythonInterpreter();
interpreter.exec("from google.cloud import bigtable");
interpreter.exec("import your_other_python_modules_here");

// Your Python script code goes here
interpreter.execFile("path_to_your_python_script.py");

interpreter.close();
```

Replace `"path_to_your_python_script.py"` with the path to your Python script containing the BigTable query.

Happy Testing!

Thursday 7 March 2024

How to fetch the file from azure blob storage using API

To fetch a file from Azure Blob Storage using an API, you typically use the Azure Storage Blob client library, which provides APIs for interacting with Azure Blob Storage. Here's a general outline of how you can do it in Python using the `azure-storage-blob` library:

1. Install the Azure Blob Storage library:
   ```
   pip install azure-storage-blob
   ```

2. Import the necessary modules:
   ```python
   from azure.storage.blob import BlobServiceClient, BlobClient, ContainerClient
   ```

3. Connect to your Azure Storage Account:
   ```python
   connection_string = "<your_connection_string>"
   blob_service_client = BlobServiceClient.from_connection_string(connection_string)
   ```

4. Get a reference to the container where your blob is stored:
   ```python
   container_name = "<your_container_name>"
   container_client = blob_service_client.get_container_client(container_name)
   ```

5. Get a reference to the blob you want to fetch:
   ```python
   blob_name = "<your_blob_name>"
   blob_client = container_client.get_blob_client(blob_name)
   ```

6. Download the blob content:
   ```python
   with open("<local_file_path>", "wb") as f:
       blob_data = blob_client.download_blob()
       blob_data.readinto(f)
   ```

Replace placeholders such as `<your_connection_string>`, `<your_container_name>`, `<your_blob_name>`, and `<local_file_path>` with your actual Azure Storage Account connection string, container name, blob name, and local file path, respectively.

Sunday 3 March 2024

LoadRunner Block Size for Parameterization | Addressing Allocation Challenges and Failures in load runner scripting

In LoadRunner scripts, we often use a block size per virtual user (vuser) to handle a large range of unique values for a parameter. However, if a test execution fails midway, it can be challenging to reallocate the block size by identifying the unused values again. Here's a simplified explanation of a Dynamic Allocation Algorithm to manage block size per vuser in a LoadRunner script:

Imagine you're organizing a party where you want to distribute candies equally among your friends. Initially, you have a large bag of candies representing all the unique values available for the parameter in your LoadRunner script. Each friend (virtual user) needs a certain number of candies (block size) to perform their actions during the party (test execution).

Here's how the Dynamic Allocation Algorithm works:
  • Calculating Ideal Distribution: You calculate how many candies each friend should ideally get based on the total number of candies in the bag and the number of friends. This ensures a fair distribution.
  • Adjusting for Optimal Sharing: Sometimes, the ideal distribution might result in too many candies for each friend, which could be wasteful. So, you adjust the distribution to make it more optimal, ensuring everyone gets enough candies without excess.
  • Updating Remaining Candies: After each round of distribution, you keep track of how many candies are left in the bag. This helps you manage the distribution better in subsequent rounds.
  • Simulating Party Rounds: You repeat this distribution process for each round of the party (test execution), ensuring that each friend gets their fair share of candies according to the dynamically adjusted block size.
Sample code:
// Initialize variables
var totalUniqueValues = 1000; // Total number of unique values
var blockSize = 100; // Initial block size per vuser
var remainingValues = totalUniqueValues; // Initialize remaining unique values
var vusers = 10; // Total number of virtual users

// Function to dynamically allocate block size per vuser
function allocateBlockSize() {
    // Calculate the ideal block size per vuser based on remaining values and vusers
    var idealBlockSize = Math.ceil(remainingValues / vusers);

    // Check if the ideal block size exceeds a certain threshold
    if (idealBlockSize > 150) {
        // Reduce the block size to ensure optimal distribution
        blockSize = Math.ceil(idealBlockSize * 0.8); // Reduce by 20%
    } else {
        // Keep the block size within acceptable limits
        blockSize = idealBlockSize;
    }

    // Update remaining values after allocation
    remainingValues -= (blockSize * vusers);

    // Log the allocated block size
    lr.log("Allocated block size per vuser: " + blockSize);
}

// Main function to simulate test execution
function simulateTestExecution() {
    // Simulate test execution for each vuser
    for (var i = 1; i <= vusers; i++) {
        // Perform actions using parameter values within allocated block size
        lr.log("Vuser " + i + " executing with block size: " + blockSize);
        // Here you would execute your LoadRunner script actions using parameter values within the allocated block size
    }
}

// Main function to run the test scenario
function runTestScenario() {
    // Simulate multiple iterations of test execution
    for (var iteration = 1; iteration <= 5; iteration++) {
        lr.log("Iteration: " + iteration);
        allocateBlockSize(); // Dynamically allocate block size for each iteration
        simulateTestExecution(); // Simulate test execution using allocated block size
    }
}

// Run the test scenario
runTestScenario();

  • The allocateBlockSize() function dynamically calculates the ideal block size per vuser based on the remaining unique values and the total number of virtual users. It adjusts the block size to ensure optimal distribution while considering thresholds.
  • The simulateTestExecution() function represents the execution of the LoadRunner script actions for each virtual user, utilizing parameter values within the allocated block size.
  • The runTestScenario() function orchestrates the test scenario by repeatedly allocating block sizes and simulating test execution across multiple iterations.

Friday 1 March 2024

'Errors have occurred while analyzing this result. Do you want to view the error log" - Load Runner Analysis Error Fix


In one of my load testing sessions, after conducting the test, I attempted to open the LoadRunner analysis file but encountered the error mentioned above. However, I managed to resolve it using the methods outlined below.

1. Adjust Regional Settings: Set your PC to use English language settings, including English thousand and decimal separators. This ensures consistency in numeric formatting across the system.

2. Experiment: If adjusting both thousand and decimal separators seems too drastic, you can experiment by changing one setting at a time to see if it resolves the issue. However, in many cases, setting both to English standards is necessary for compatibility with LoadRunner.

By aligning regional settings with English standards, you can mitigate potential discrepancies in numeric formatting and ensure smoother result analysis in LoadRunner.